
Hey there, lovelies. I'm super excited to have you join me as I share some of design process and behind the scenes of one of my latest interior design projects.
In this blog post, I'm delighted to share the story of a collaboration with an amazing client and the transformation of their new house into a their dream home. Together, we have created a dream home to reflect the personality and style to suit the family.
Before I dive into the design nitty-gritty, let me introduce myself – I'm Holly and I believe that every house has a unique tale to tell, and my passion lies in weaving the threads of design to create spaces that truly reflect the personalities and dreams of their inhabitants.
In this behind-the-design sneak peek, I'll be spilling all the secrets that turned this house into a home. From the initial design inspiration to the magical moment of reveal, I want you to feel like you were right there with us, experiencing the joy of transforming this space.
My clients chose this house as they wanted to put their stamp on it so we have worked from the floor up and changed and sourced everything for every room from the flooring to the curtains, the paint to the furniture.
So, pull up a chair, make yourself a coffee and prepare to be inspired by the magic of design as I take you on a tour through the layers of creativity that transformed this house into a home where memories are born and cherished. Welcome to the story behind our latest interior design project!
OPEN PLAN KITCHEN, LIVING, DINING
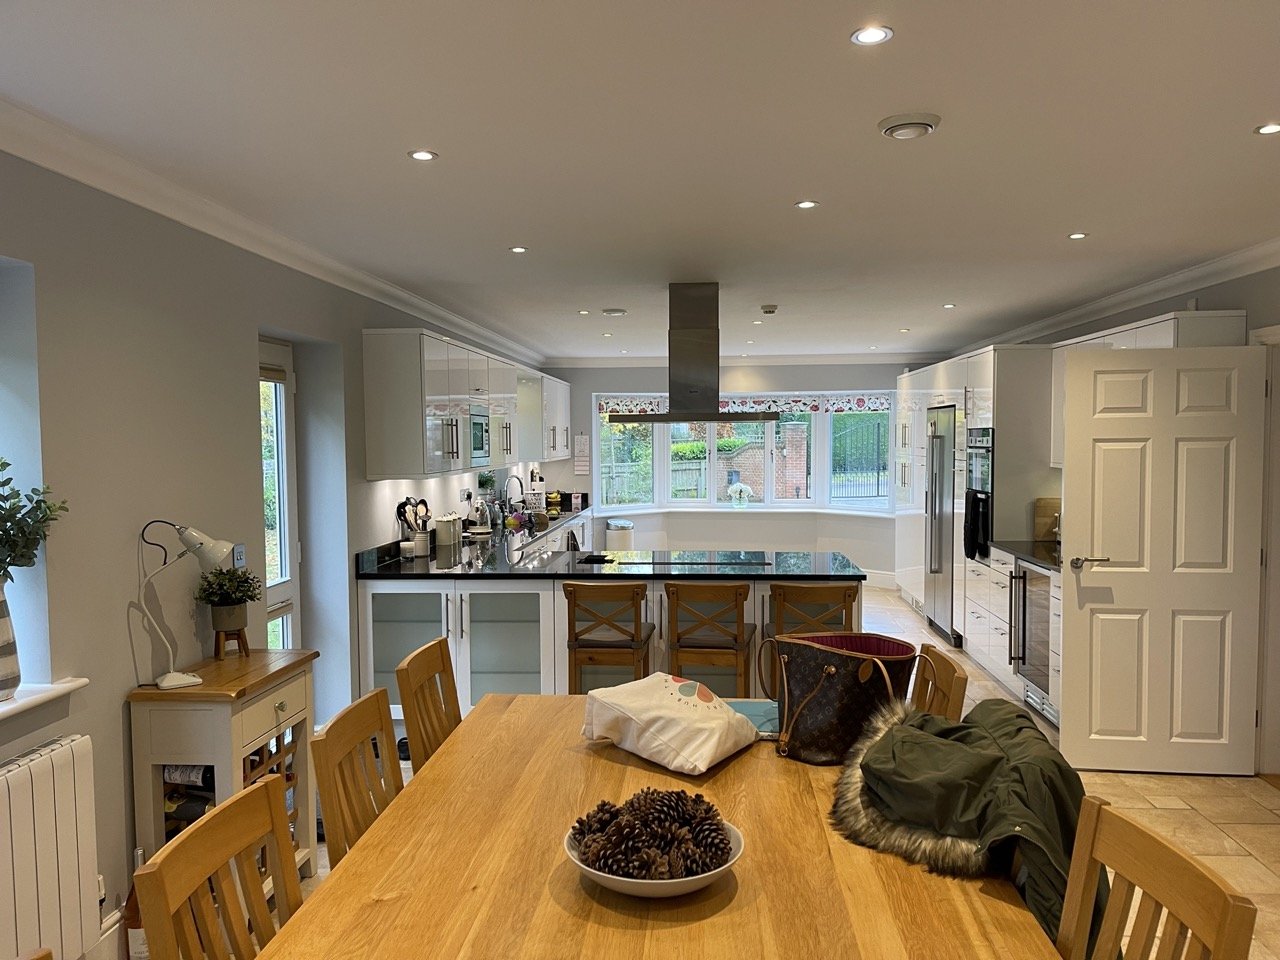
BEFORE
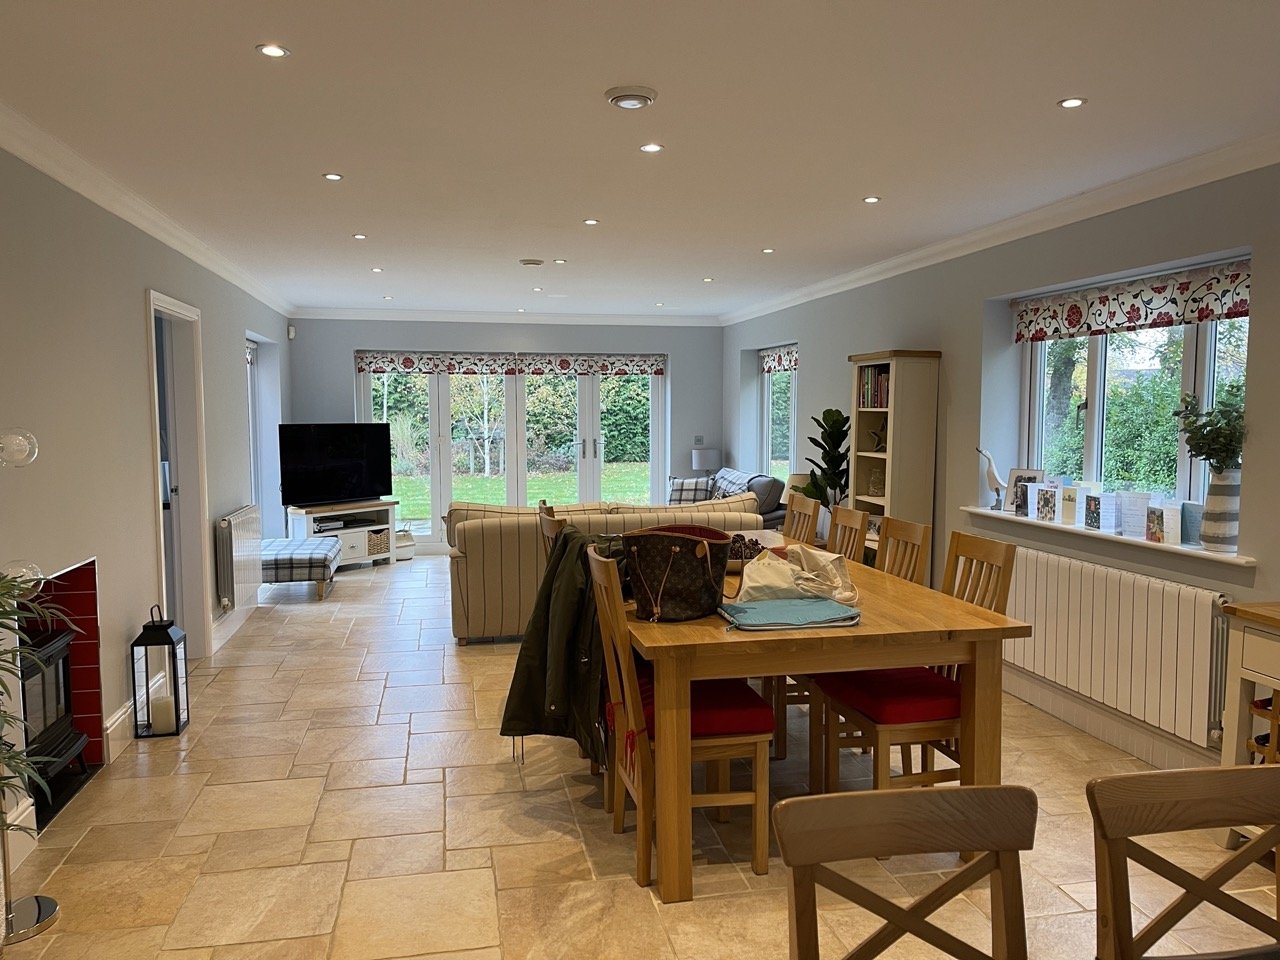
The Kitchen was pretty bland and boring painted in a pale grey with accents of red, not to my client’s taste when they moved in.

Concept
To create a relaxing home with an element of fun and elegance. Love of neutrals with accents of colour.
I start the design process with a consultation which enables me to get an understanding of your likes and dislikes, how you want to use your space and who is going to use it. It’s important to design a space which is practical as well as looking good.
I then start with colour concepts for each space to reflect the colours and feeling I am wanting to portray. This neutral and blue concept was the initial stage for this project in Shiplake.

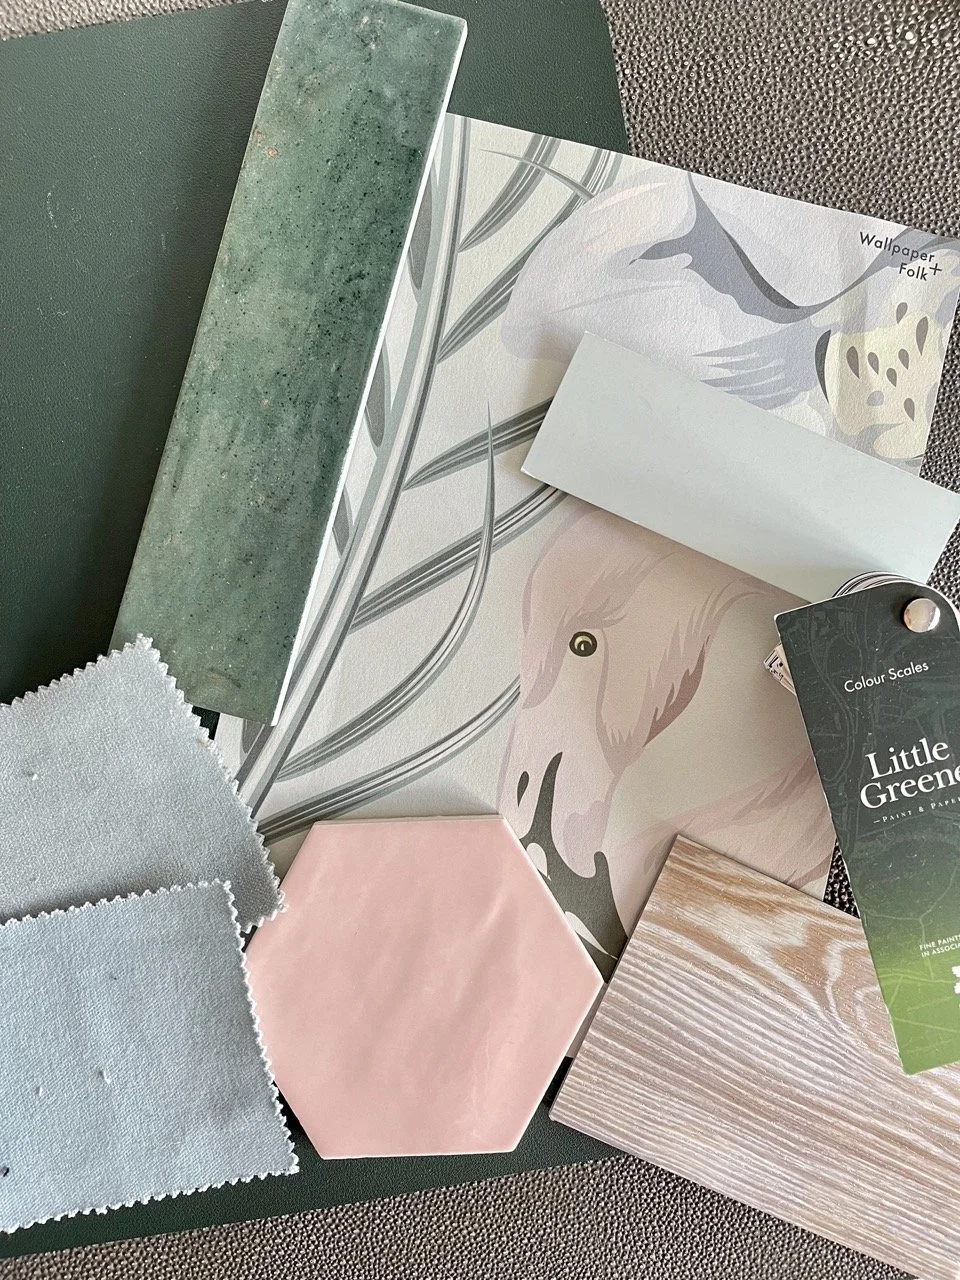
MOODBOARD
DESIGN
We worked with a kitchen designer and my building team to work out what was possible with creating the kitchen so that my clients could have all the internal space they needed along with all the gadgets and I designed a bespoke breakfast cupboard to hide away all the appliances when not in use! I then take the kitchen design and source all of the other elements needed in the room like the furniture, lighting, window dressings etc. I presented this as a moodboard. Along with this I present a floor plan which is to scale to show the layout of the room along with 3D visuals so that my clients could see my vision in their space.
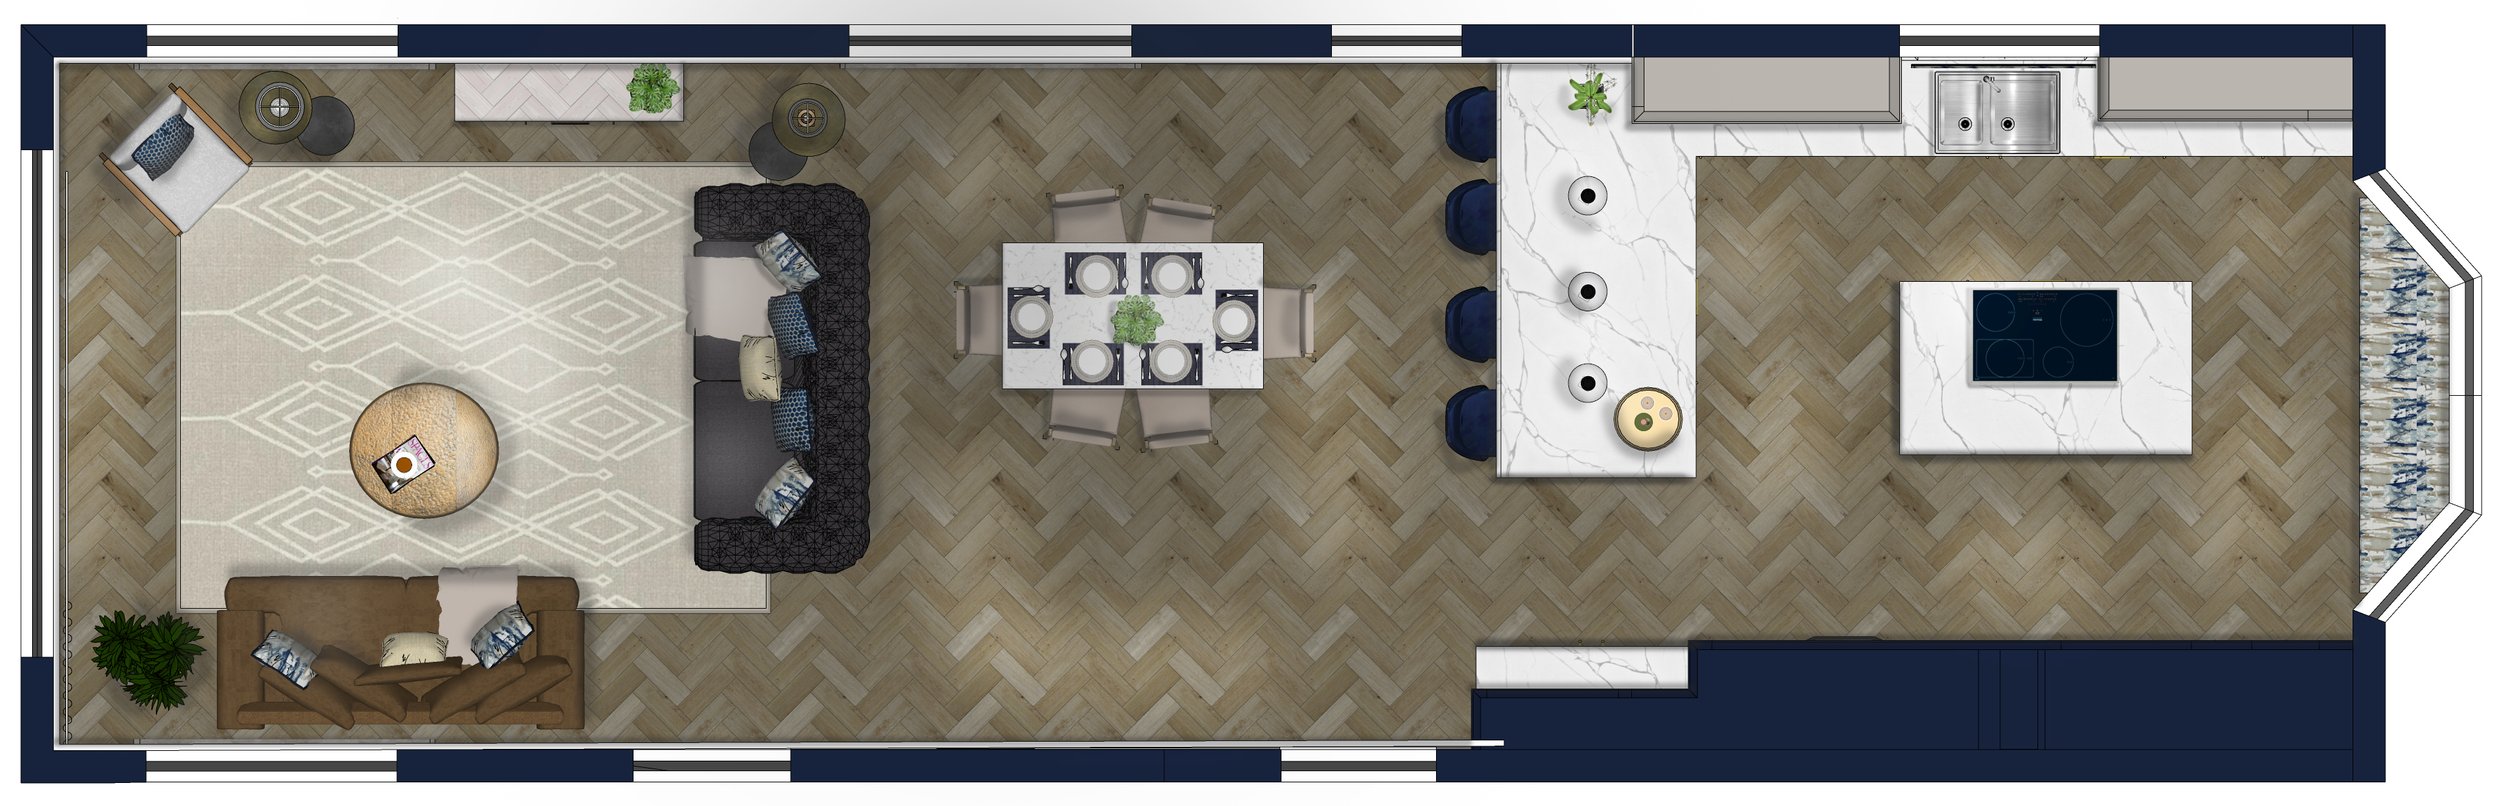
Floor plan/furniture layout

Kitchen/Dining

Kitchen into dining/family room

Family/snug section
DESIGN FEATURE
One feature that really bugged me when I first went to the consultation was the small woodburner in the kitchen. It looked out of proportion to the wall and wasn’t central to the space. It just looked out of place. My clients wanted to keep a woodturner in the kitchen for the cosy feel in the winter but didn’t really like the red tiles and agreed that it looked odd! We couldn’t move its position on the wall due to the utility room behind it. I wanted to make it into a feature in the design and used tiles to frame it and make it a focal point and give it purpose.

Woodburner before

Design to make the woodburner into a feature
WORK IN PROGRESS…….


FINISHED…..

Kitchen
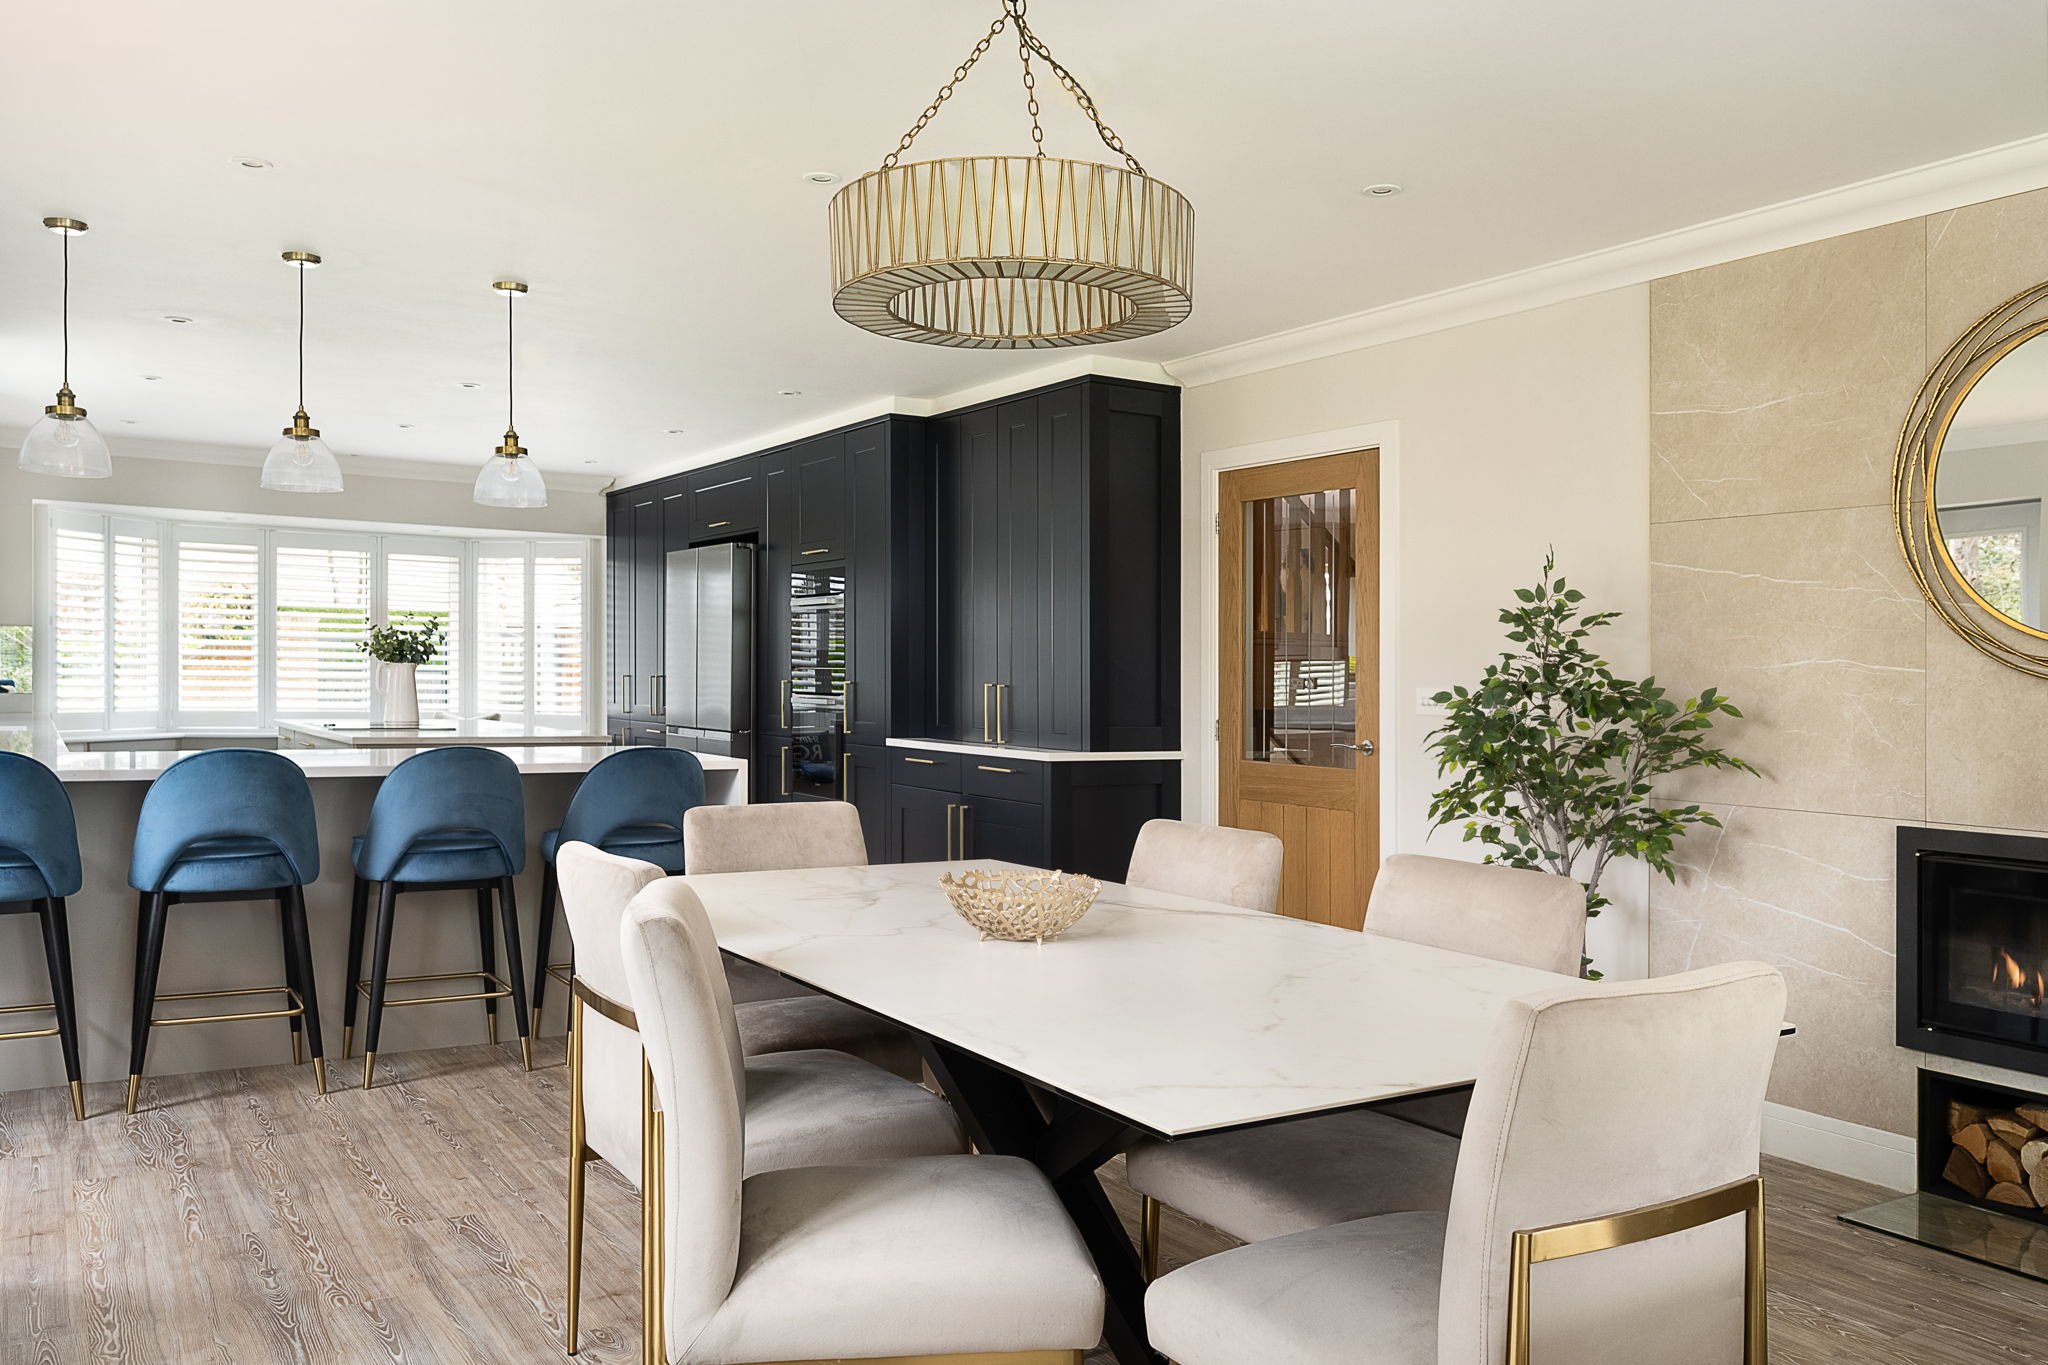
Dining Table

Wood-burner feature wall

Breakfast Cupboard

Roman Blind in neutrals and blues with antique mirror splash back

Storage Window Seat

Family snug area

Accent chair

Bar unit with neon drinks sign for a tough of fun
Hallway
The hallway is such an important space to design as it creates a first impression as you walk through the front door and also leads to all the rooms in the house. It needs to reflect your personality and style yet work with the rooms leading off it.

BEFORE
Hallway
AFTER
Soft neutrals with a pop of fun colour, brass accents and a large mirror to reflect more light into the hallway along with layered statement lighting to create a warm ambiance on dark winter evenings.
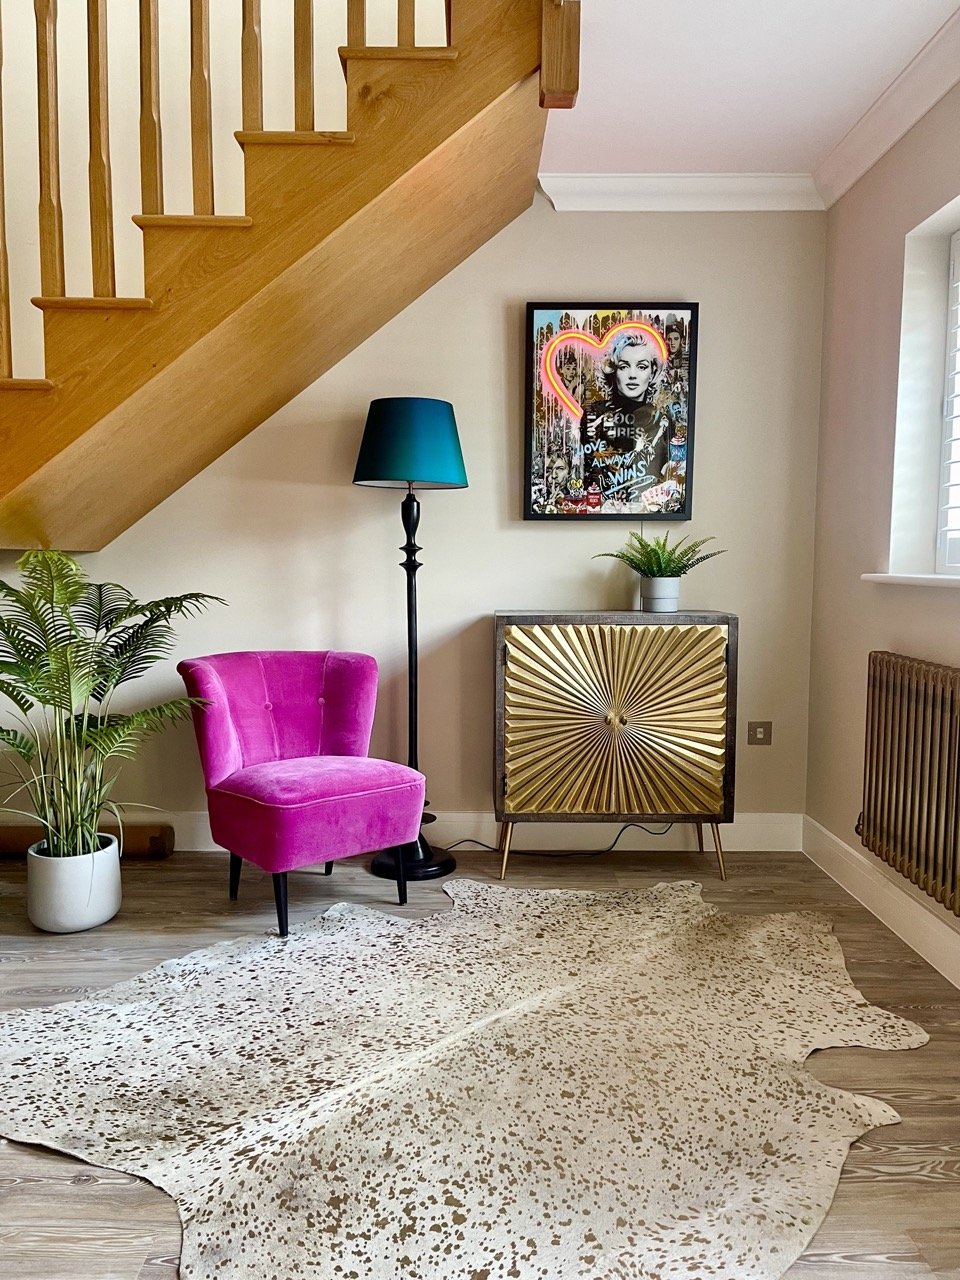
Neutrals with a pop of fun colour

Large sideboard for storage with layered lighting and a statement mirror
CLOAKROOM
When I first met my client one of the first things she asked for was a Flamingo light to be somewhere in her home as she told me she loves flamingoes. I topped that and found fabulous flamingo wallpaper for her downstairs cloakroom.
Your cloakroom is a great place to add some fun wallpaper or go a little crazy with your paint colour because it’s usually the smallest room in your house and it’s fun to create a talking point when you have friends over.
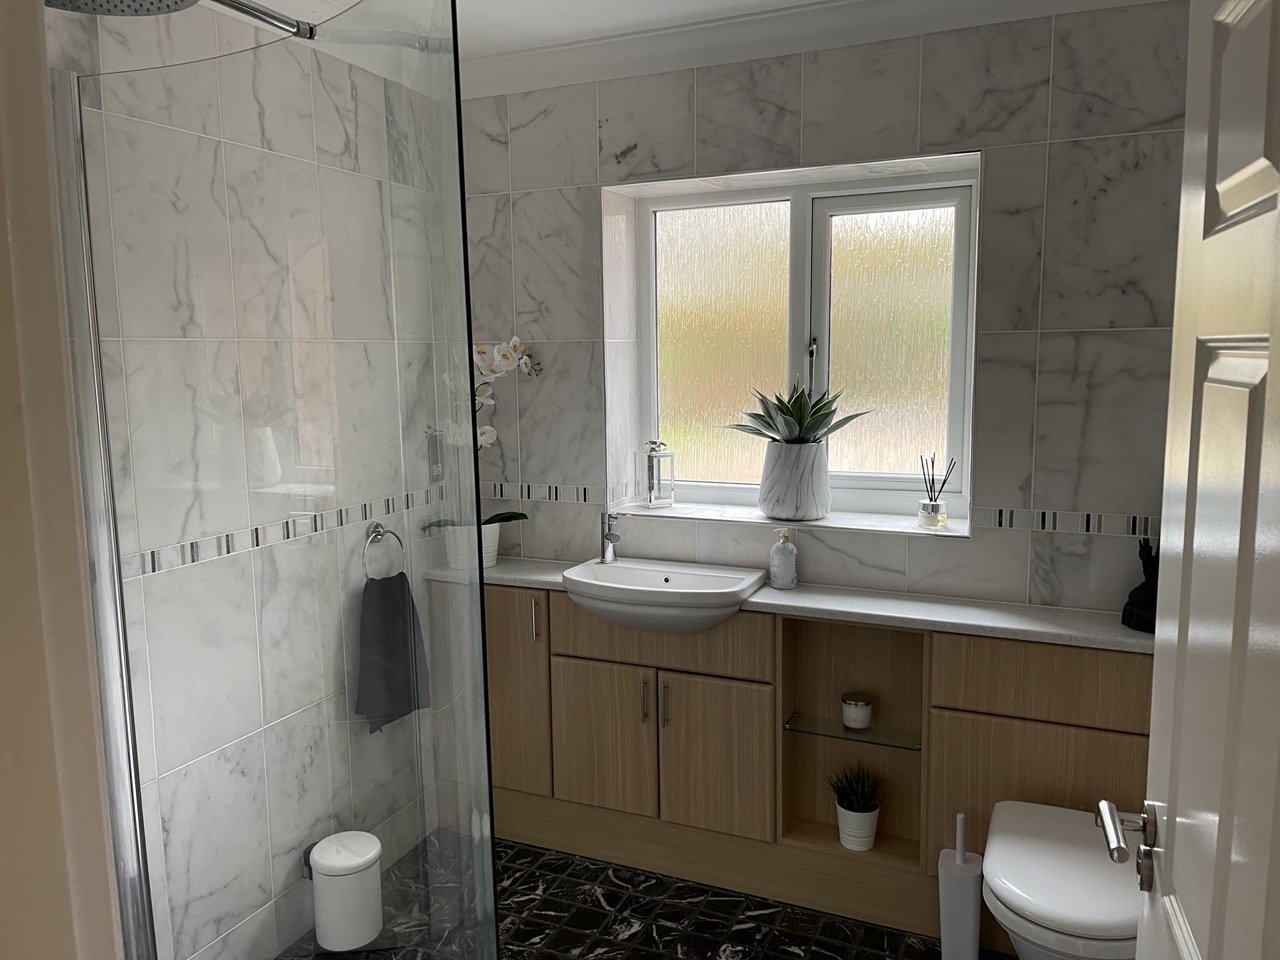
BEFORE
Boring with an annoying glass shower screen that you almost walked into when you entered the room

Samples

AFTER
LIVING ROOM
Let’s talk about the living room. This room wasn’t even being used by my clients when I first went to visit them as they were using it as a storage room for all the moving boxes. This is what it looked like before…
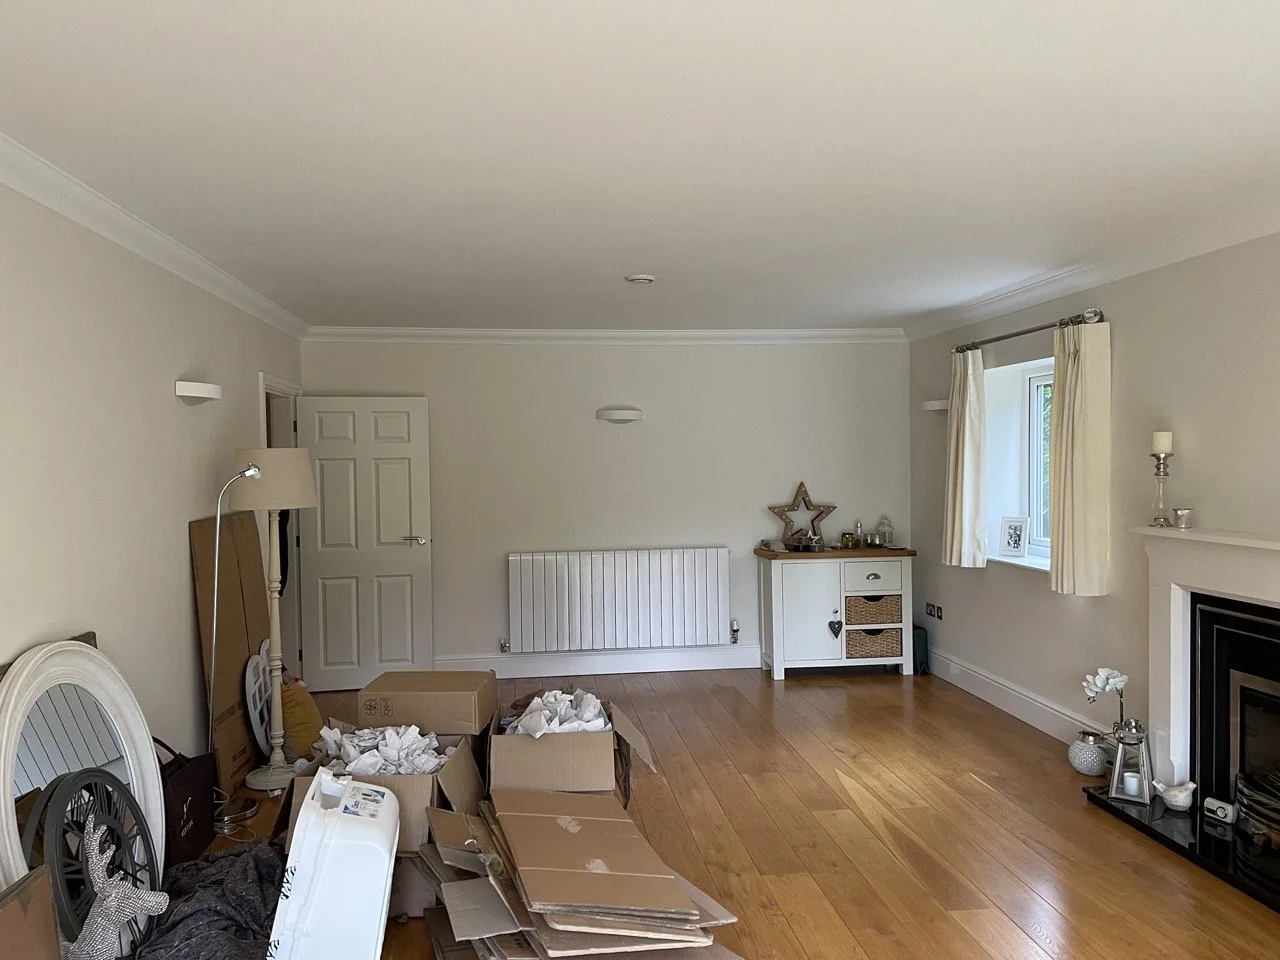
Living Room BEFORE

Living Room Moodboard
I designed this bespoke built in media unit to hide the TV away until it’s needed. This living room was designed to be a feminine peaceful space for my client to escape to at the end of the day. If you’d like some styling tips for your living room you can grab some here.
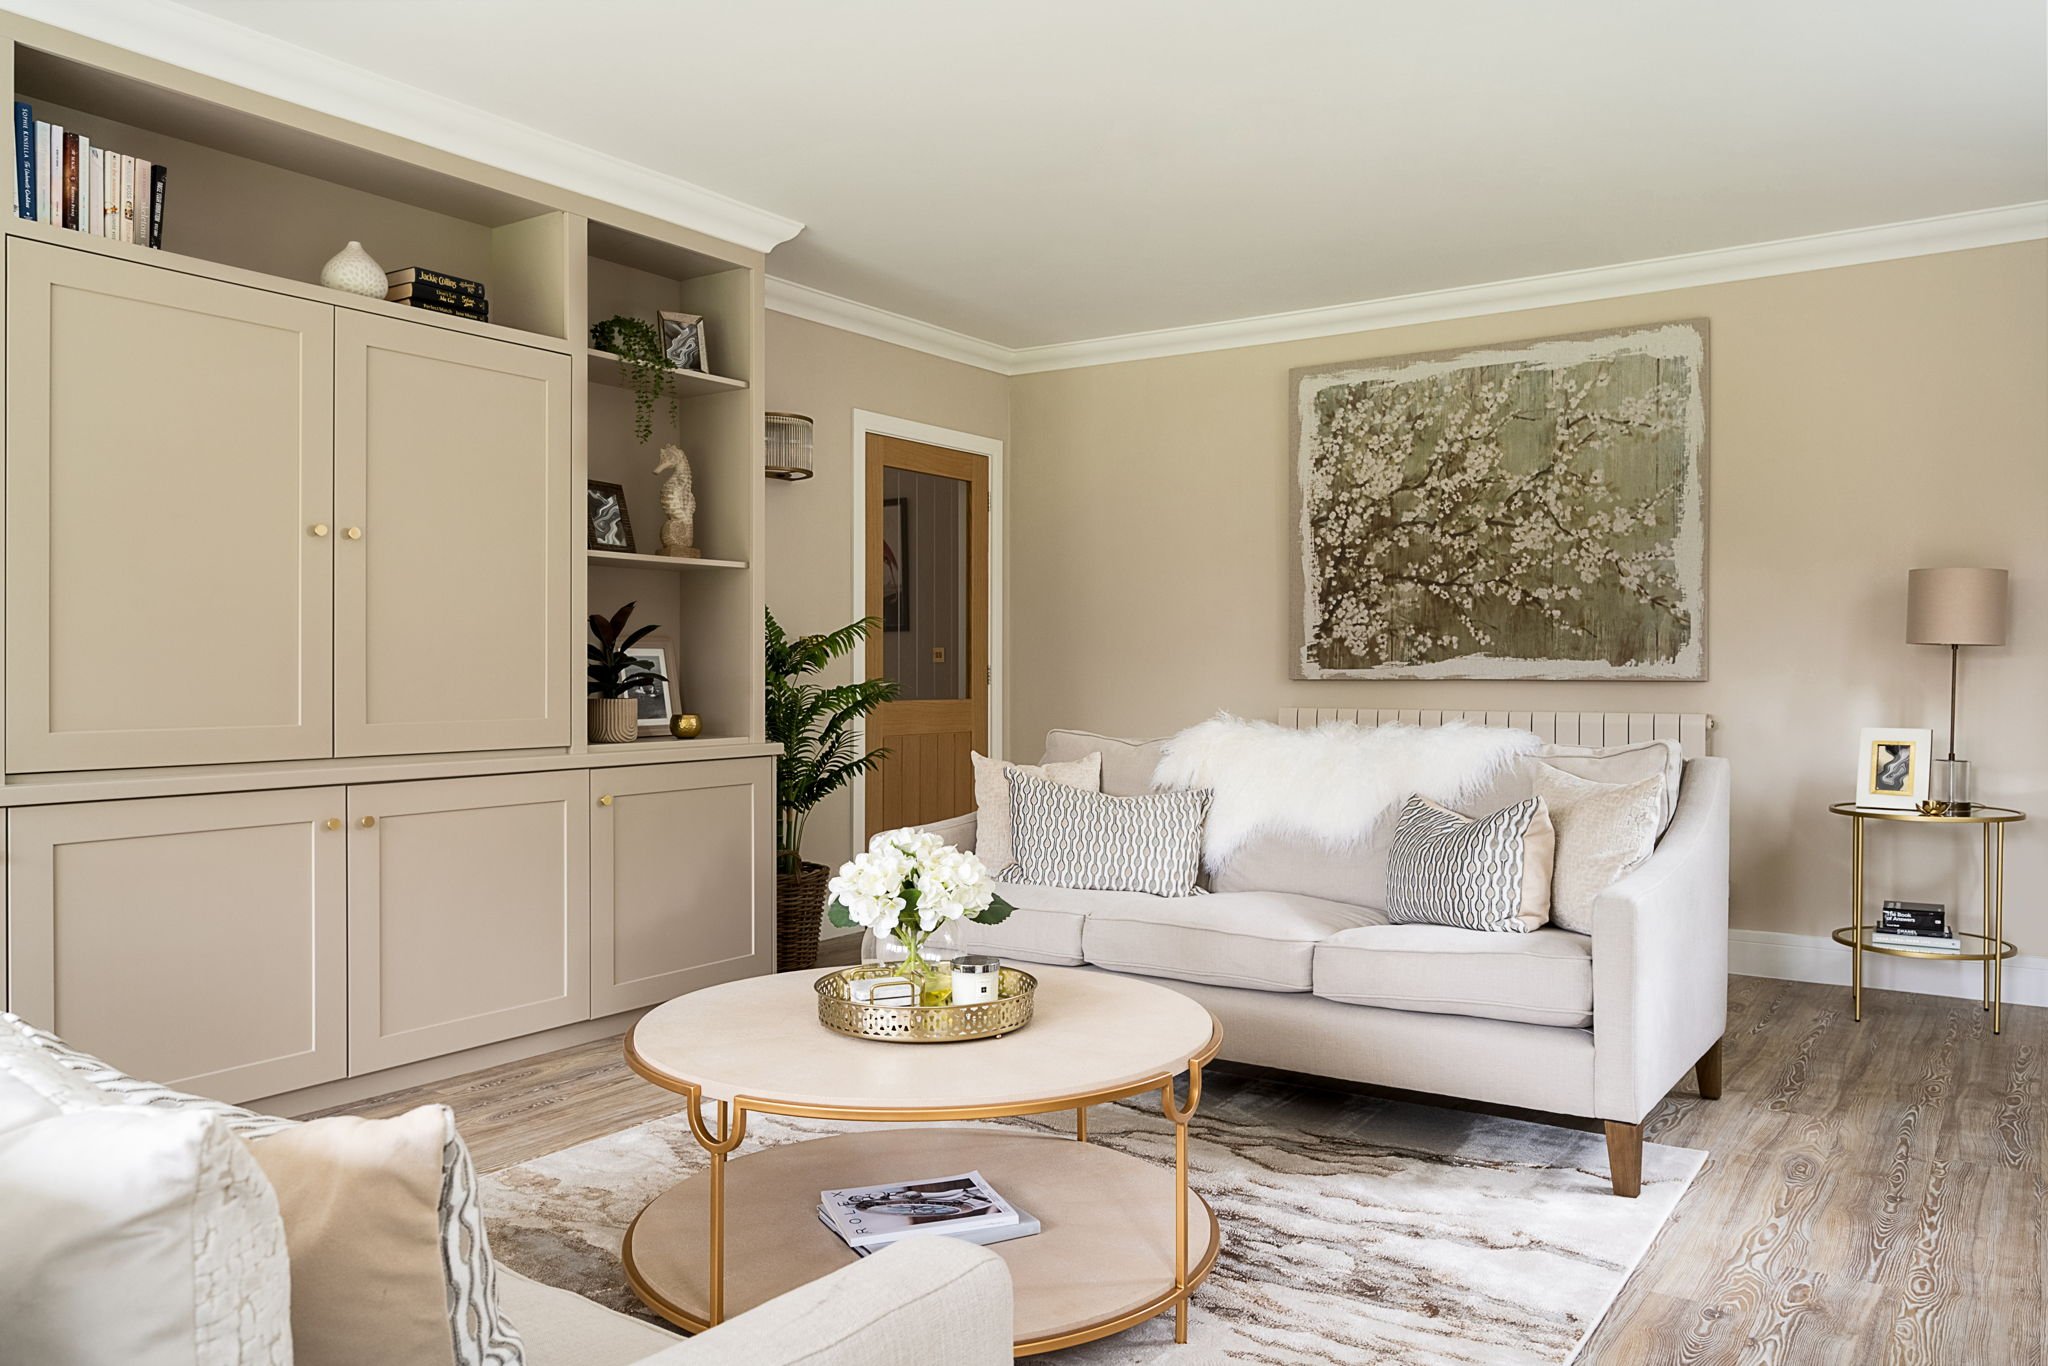
Bespoke Media Unit


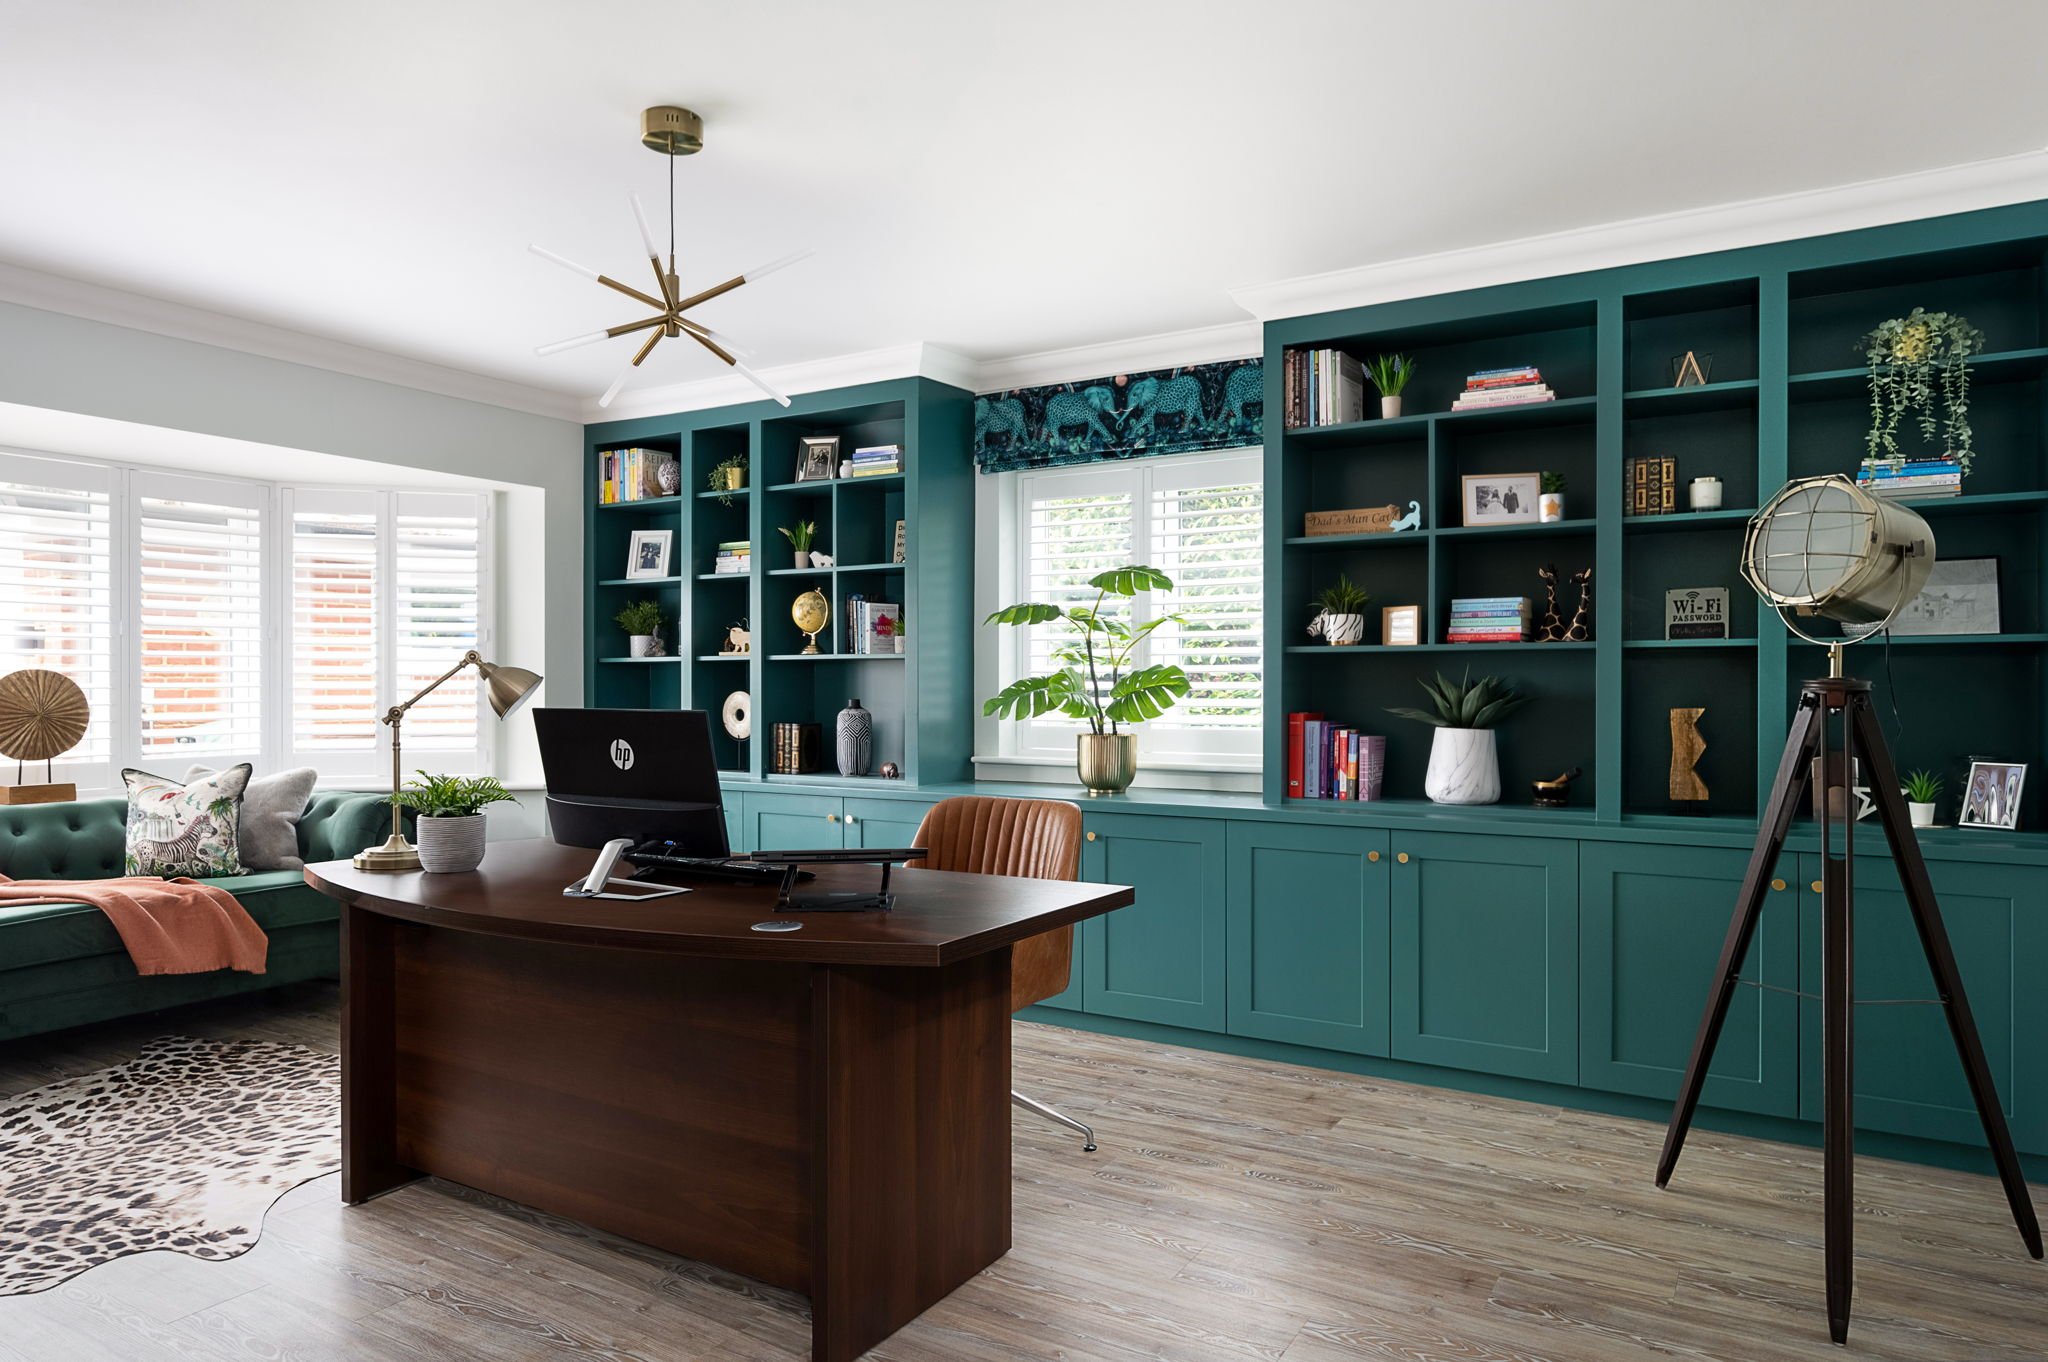
HOME OFFICE
When I first met my clients, this room was very dull and my client was sat at a tiny Ikea desk in the window which was only big enough for a laptop. You can see that the previous owners had painted around a piece of furniture which must have sat in the corner of this room as the paint colour is different and the room felt rather uninspiring.

BEFORE
Home Office

Home Office Design
I'm so pleased with how this room has turned out and my client is so much happier in his elevated home office. This is very much his room of the house and the design details which really reflect his personality and style include the blind fabric which has a South African theme to it to remind him of his childhood. I used this fun element as a theme to this room as you can see the fun zebra wall lights, animal print rug and zebra cushion. I designed the bespoke cabinetry to wrap around the window to maximise storage and the open shelving is a fun space to display artefacts, book and photos.


Turning your house into your dream home can feel overwhelming but if you follow the right process you can break it down and avoid making expensive mistakes.
Get in touch if you’d like me to design any rooms in your house and help you transform it into your dream home.
Or if you’re inspired to do it yourself then I have created a fabulous online course to help you. Happy Home Design, is an online course, where I teach you my design process in easy steps to help you create your dream home. You get my help and support along the way in our private community and you can also book private calls if you need a little extra help and support from me. It really is the best way to help support you to create your dream home.

Please give me a shout if you have any questions or would like any help with an upcoming project.
